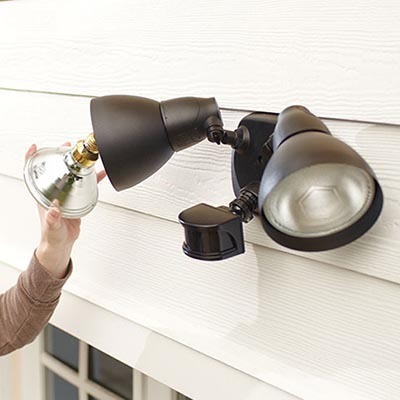
The presence of outdoor motion sensor lights not only makes you feel safer at home but they also are a relief in places, such as swimming pools, terrace or path to the door.
They are also useful when one has to step out in an emergency during the night.
The good news is installing outdoor motion sensor lights isn’t too difficult.
You could get an electrician but why not try installing it yourself?
Here is a step-by-step list to help you install your outdoor motion sensor lights:
- Make sure you turn off the electricity at the circuit breaker box or main fuse box. This will ensure your safety. I suggest turning off the main fuse box as it is the safest way.
- Keep the instructions manual, screws, screwdrivers and the light handy with you. This will help you save time and complete the task in one go.
- Install an electrical box if you don’t already have one. If you do, then skip to the next point.
- Place the rubber gasket that fits tightly against the base of the fixture where it attaches to the wall. This should be done with the utmost precision.
- Now, run the wires through the rubber gasket. You will need to connect all the wires with the connectors. Make sure the neutral wires run together and hot wires are together. The neutral wire is white and the hot wires are black, red and blue. However, there can be a few exceptions.
- Now, simply screw in the bulbs.
- Next, screw the fixture into place.
- Point the light bulbs to the area that you require light.
- Turn the main fuse box on.
The process of installing motion sensor light is not complicated yet requires precision as there will be tasks related to electricity and some wire connections and screws.
Even after installing the motion sensor lights, you may need to adjust them according to your needs.
The adjustment is even more important in the case of outdoor motion sensor lights as the requirements may vary for the area around the swimming pool or a terrace.
Here are a few tips on how to adjust your outdoor motion sensor lights:
- Partially unscrew the sensor's ball joint. Now, position it to the area where you want them to light up.
- Fully tighten the screw again.
- Try to keep the sensor at least 2 inches away from the bulbs.
- Adjust the range to adjust the sensor's detection zone.
- Now, you should test. Set the timer button to the "test' setting.
- Also, You may need to wait 90 seconds to allow the unit to warm up.
All the steps mentioned above will help you install your motion detector lights and adjust them so that you can get the maximum benefit out of your outdoor motion sensor lights.
Also, be sure to check out my reviews of the best outdoor motion sensor lights.

